This tutorial will help you to add or re-configure a JetHost PRO Email account in Microsoft Outlook 2019.
We will be using a test email account email@yourdomain.com. Of course, you will have your own email address so substitute that in the appropriate places.
NOTE: Before proceeding, make sure you have a mailbox created.
Follow these steps in order to add a new email account:
1. Open Microsoft Outlook 2019 on your device.
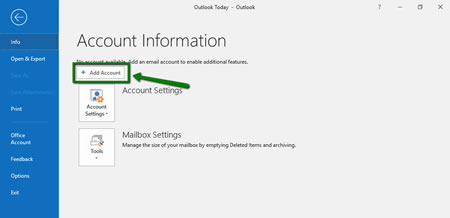
2. If you don't have any mailboxes added yet, you will see the Account Information page. Click the + Add Account button there. If you have mailboxes set up already, go to File tab >> Info >> Account Information and click the + Add Account button:
3. Type in your full email address to continue:
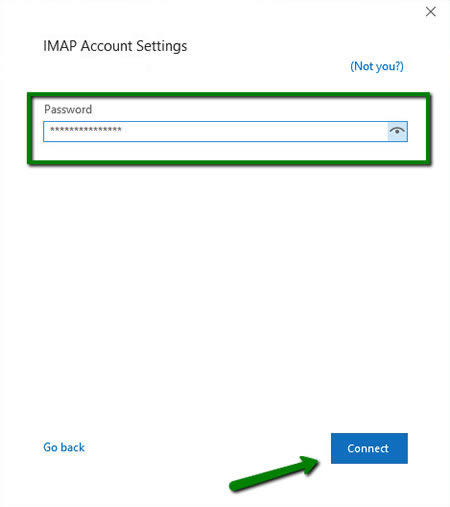
5. (Only needed if automatic steps above did not work) - Select the Change account settings option and click Next. On the next page, select the POP or IMAP option:
POP3 stands for Post Office Protocol, and was designed as a simple way to access a remote email server. POP works by downloading your emails from your provider's mail server and then marking them for deletion there. This means you can only ever read those email messages in that email client, on that computer. You will not be able to access any previously downloaded emails from any other device, or with any other email client, or through webmail.
IMAP stands for Internet Message Access Protocol, and was designed specifically to eliminate the limitations of POP. IMAP allows you to access your emails from any client, and any device, and webmail login at any time, until you delete them. You can also use different devices and email/webmail clients to access the same mailbox and check, send and receive email, which is not available with POP3 connection.
- Incoming mail server: imap.stackmail.com
- Incoming mail port: 993
- Encryption method: SSL/TLS
- Require logon using Secure Password Authentication (SPA): should be unchecked
- Outgoing mail server: smtp.stackmail.com
- Outgoing mail port: 465
- Encryption method: SSL/TLS
- Require logon using Secure Password Authentication (SPA): should be unchecked

7. If you choose POP account setup, enter the following server details:
- Incoming mail server: pop3.stackmail.com
- Incoming mail port: 995
- This server requires an encrypted connection(SSL/TLS): should be checked
- Require logon using Secure Password Authentication (SPA): should be unchecked
- Outgoing mail server: smtp.stackmail.com
- Outgoing mail port: 465
- Encryption method: SSL/TLS
- Require logon using Secure Password Authentication (SPA): should be unchecked
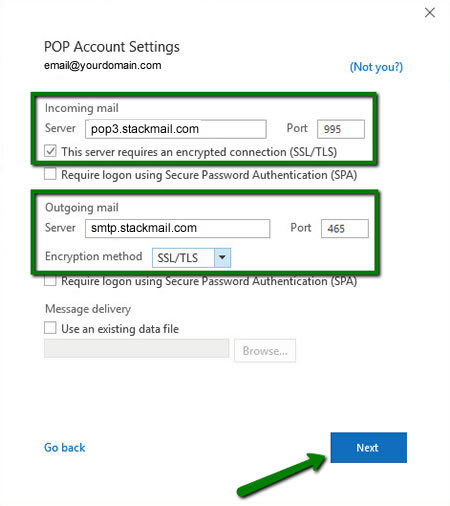
8. Once all the details are filled, click Next.
9. After that, type in your email password and click connect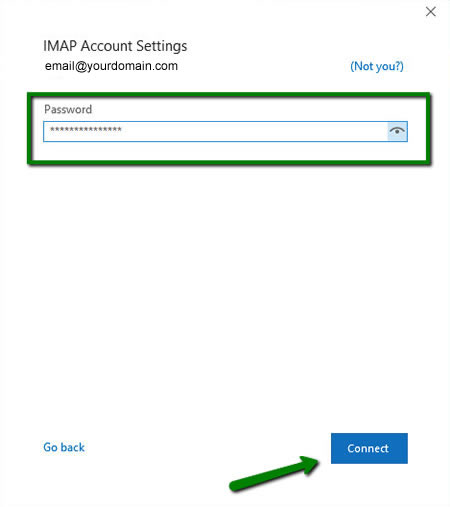
10. If all the settings are correct, you will receive the following message. 
Click Done to complete the setup.
In order to configure/check or update the configuration of an existing email account, complete the following steps:
1. Open Microsoft Outlook 2019 on your device.
2. Go to the File tab >> Info >> Account Information page and click on Account Settings:
3. Select the mailbox in question and click Repair: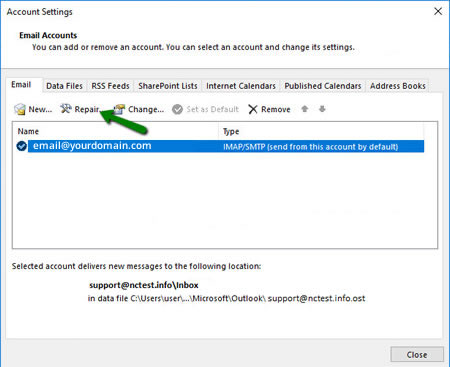
4. In the next window, click on Advanced options, check Let me repair my account manually and click on Repair: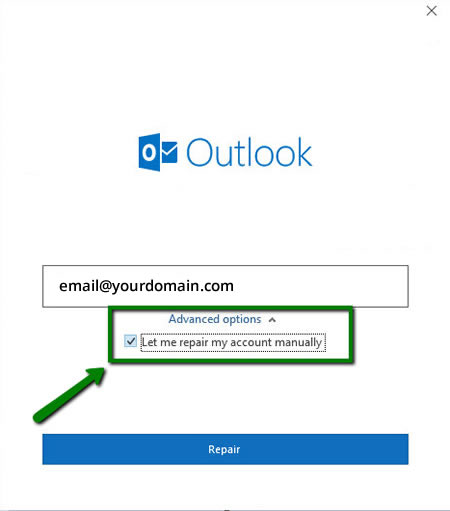
5. On the next page, you will see incoming and outgoing server settings.
Make sure all of them are set properly. If any information is set incorrectly, update it for both Incoming mail and Outgoing mail configurations: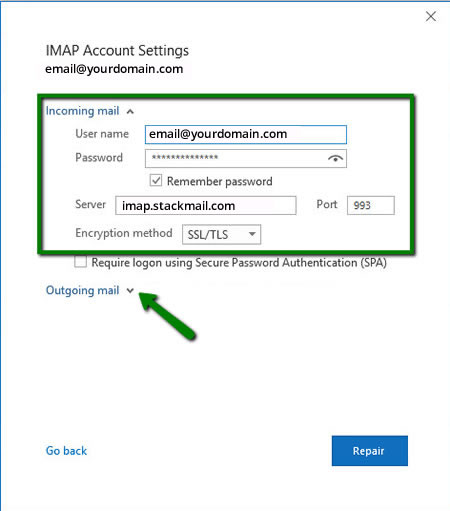
6. Once all details for the outgoing connection are updated, click Repair: 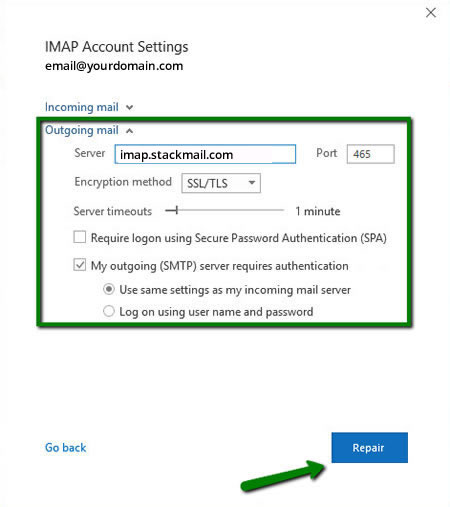
That's it!