This tutorial will show you how to set up a JetHost PRO email account on Blackberry 10x device.
We will be using a test email account email@yourdomain.com. Of course you will have your own email address so substitute that in the appropriate places.
NOTE: Before proceeding, make sure you have a mailbox created.
In order to set up an email account via IMAP/POP3/SMTP protocols, the following actions should be done:
1. Open Settings on your Blackberry device and tap on Accounts menu: 

2. Then tap on Advanced at the very bottom of the screen: 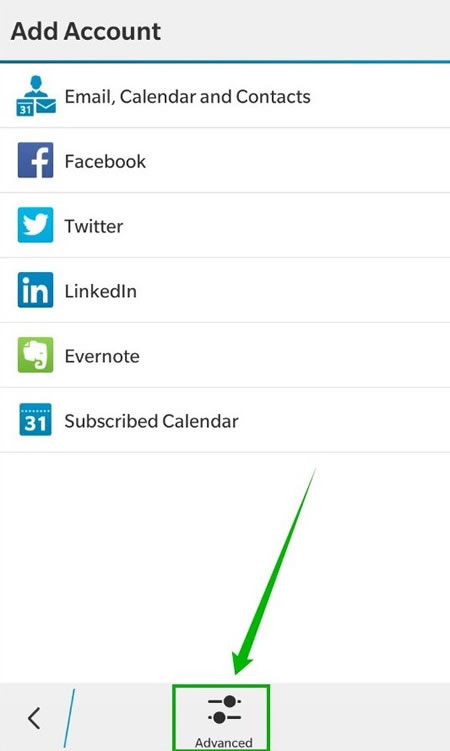
3. On the next screen, you will need to choose whether you wish to configure IMAP or POP3 account. Just select the desired option by tapping IMAP or POP3 correspondingly: 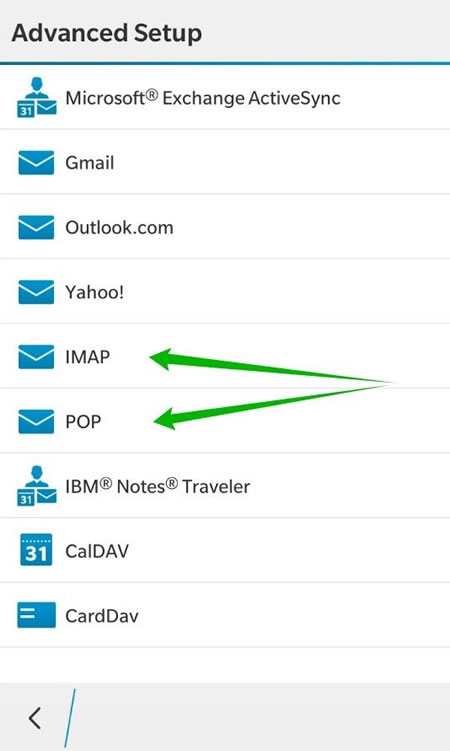
4. On the next screen you need to enter the details for your email address: 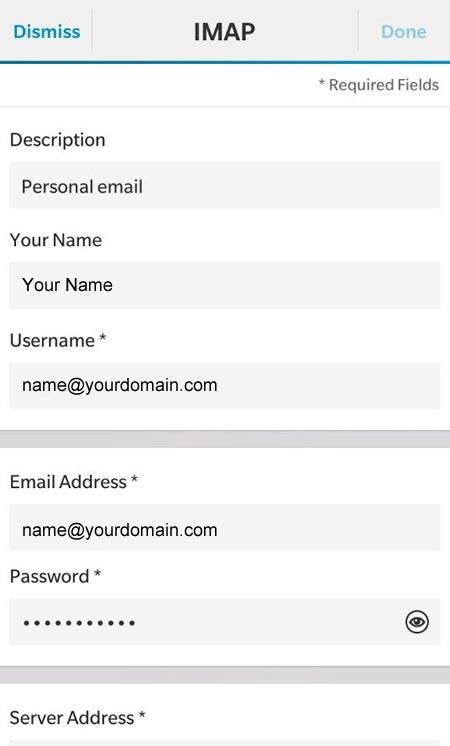
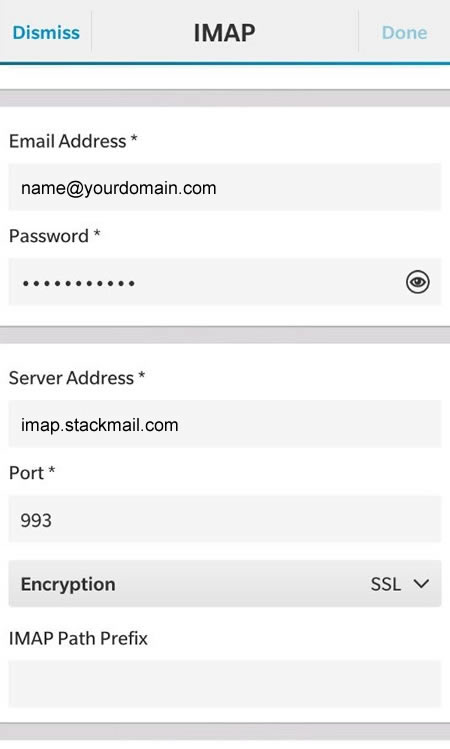

5. Here is the brief explanation of each setting:
- Description: the name of your email account
- Username: your full email address
- Email Address: your full email address
- Password: password for your email address
- Server Address: imap.stackmail.com
- Port: 993
- Encryption: SSL
- IMAP Path Prefix: leave it empty
- SMTP Username: your full email address
- SMTP Password: password for your email address
- SMTP Server Address: smtp.stackmail.com
- SMTP Port: 465
- SMTP Encryption: SSL
- Use Push if Supported: it should notify you when a message has arrived
- Append messages to sent folder: to synchronise folders in mail client and on the server
- Sync Interval, Sync Timeframe: the interval when mail client sends query to the server in order to find new messages
- Roaming Data Control, Cellular Data Control and Wi-Fi Data Control: used for data control (it helps to decrease traffic of your mobile network)
6. Once everything is filled in tap on Done in order to finish setting up: 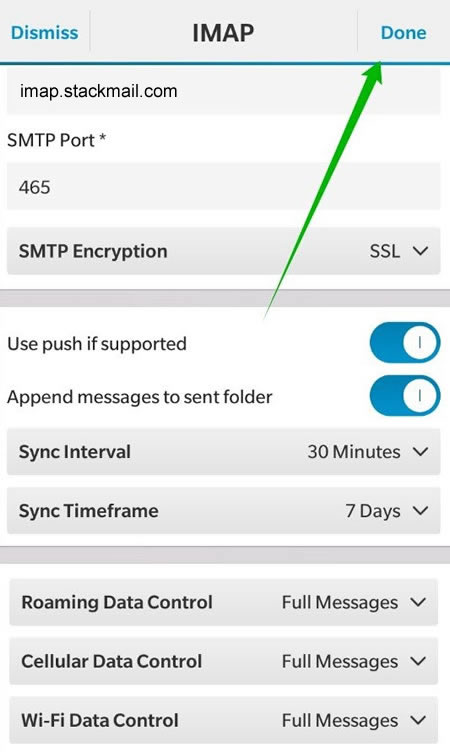
7. In case you wish to set up POP account, you need to fill in almost the same settings, the difference is only in ports and roaming data control:
- Description: the name of your email account
- Username: your full email address
- Email Address: your full email address
- Password: password for your email address
- Server Address: pop3.stackmail.com
- Port: 995
- Encryption: SSL
- SMTP Username: your full email address
- SMTP Password: password for your email address
- SMTP Server Address: smtp.stackmail.com
- SMTP Port: 465
- SMTP Encryption: SSL
- Sync Interval, Sync Timeframe: the interval when mail client sends query to the server in order to find new messages
You can see them on the screenshots below: 
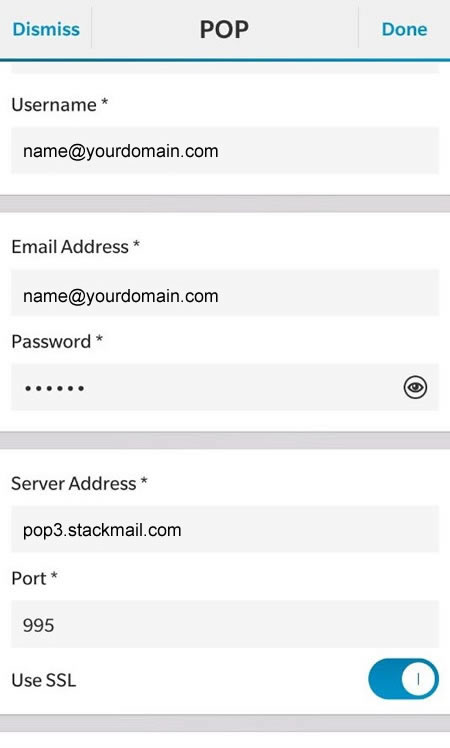

8. Then tap on Done button.
9. When everything is set up you will see the following page: 
10. From now on you are able to check your email messages on your Blackberry device. The only thing you need to do is to go back on the Home screen and swipe to the left > screen BlackBerry Hub > there you will find the messages: 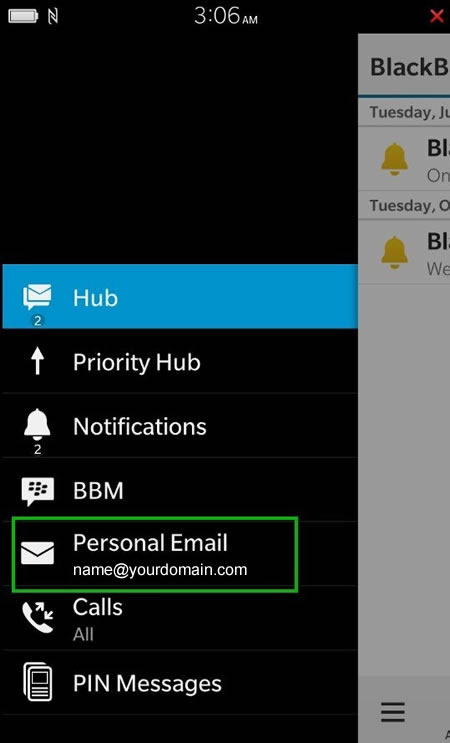
That's it!