This tutorial will show you how to set up a JetHost PRO email account in the Windows 10 default mail application.
We will be using a test email account email@yourdomain.com. Of course you will have your own email address so substitute that in the appropriate places.
NOTE: Before proceeding, make sure you have a mailbox created.
1. To create a new email account, go to Windows Settings and click Accounts:

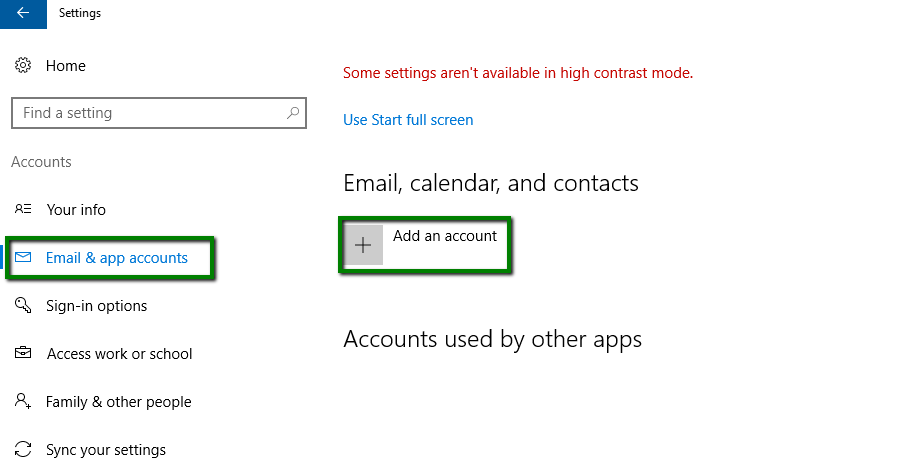
2. Go to the Email & app accounts section and click Add an account under Email, calendar, and contacts:
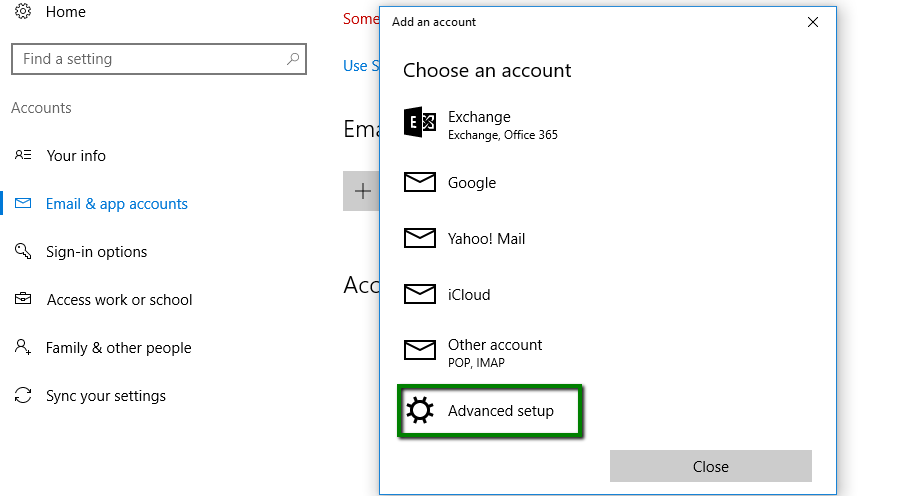
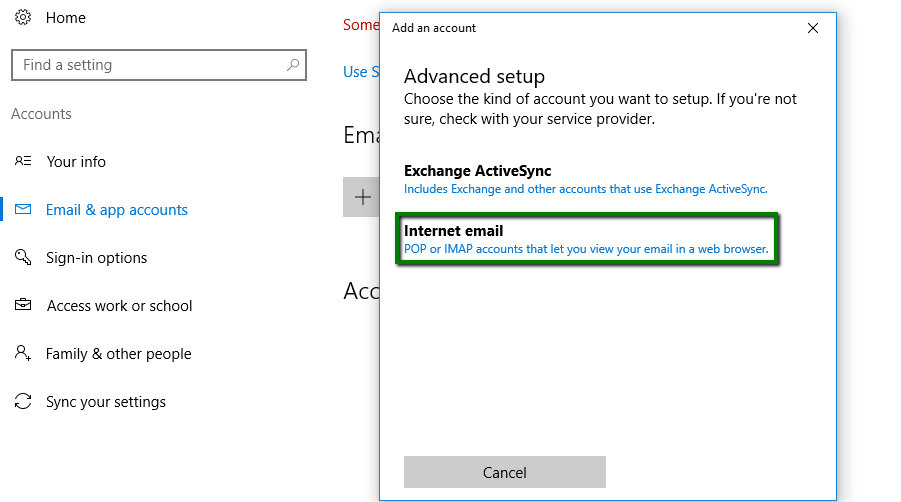
4. In the Choose an account window select Advanced setup and click Internet Email:
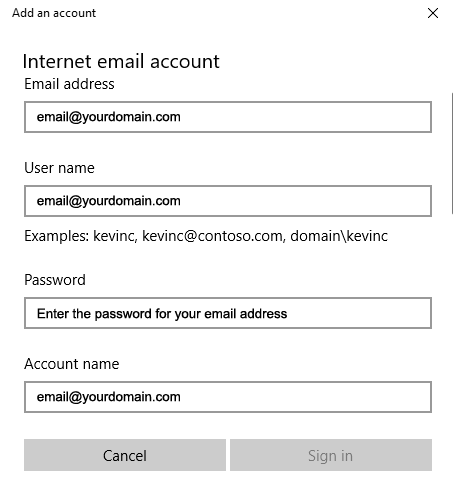
5. Enter the following details in corresponding fields:
- Email address: email@yourdomain.com (remember, use your actual email address!)
- Username: email@yourdomain.com
- Password: password for this email account
- Account name: email@yourdomain.com
- Send your messages using this name: name which will be displayed in the From field of sent emails
- Incoming email server: imap.stackmail.com (the same for all subscriptions)
- Account type: IMAP4 or POP3
- Outgoing (SMTP) email server: smtp.stackmail.com (the same for all subscriptions)
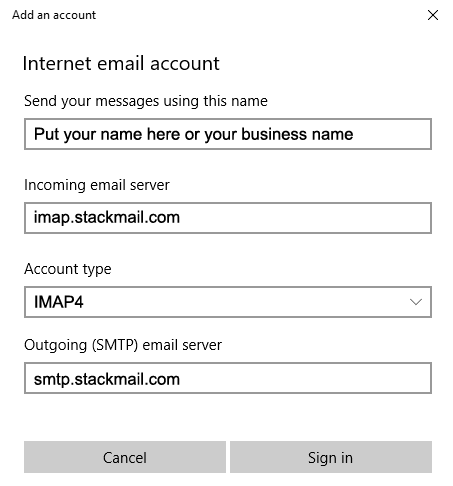
The following options should be selected:
- Outgoing server requires authentication
- Use the same username and password for sending email
- Require SSL for incoming email
- Require SSL for outgoing email

Once finished, click Sign in.
That's it. You're done!