This tutorial will show you how to set up a JetHost PRO IMAP email account on MacMail OS X El Capitan
We will be using a test email account email@yourdomain.com. Of course you will have your own email address so substitute that in the appropriate places.
NOTE: Before proceeding, make sure you have a mailbox created.
1. Select Preferences in Mail menu: 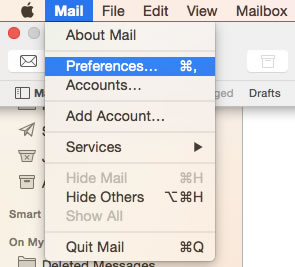
2. Go to Accounts tab, and click on + icon: 
3. Select Add Other Mail Account option: 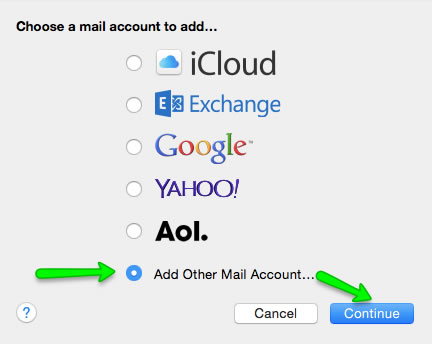
4. In Add a Mail Account window enter your full name, email address and email account password, then click on Sign In: 
5. Application will try to detect settings automatically. Disregard the result and fill in these boxes manually. Enter your account details:
Email address: full email address
Username: full email address
Password: password for your email account
Account type: IMAP
Incoming Mail Server: imap.stackmail.com
Outgoing Mail Server: smtp.stackmail.com
Click on Sign In once the details are filled: 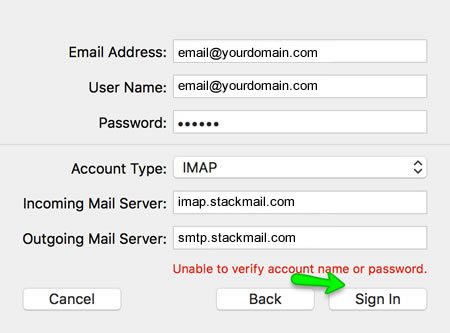
6. You may use both Mail and Notes here: 
7. The next step is to verify that Outgoing Mail Server settings are correct. While on Accounts tab of Preferences window, click on a drop-down menu next to Outgoing Mail Server (SMTP) item on the list and choose Edit SMTP Server List... from the menu: 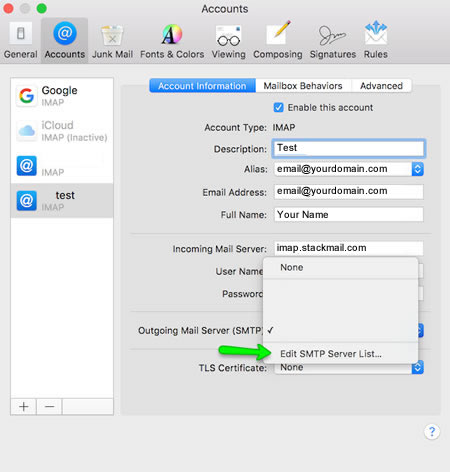
8. Switch to Advanced tab and verify that your settings are as follows:
- Automatically detect and maintain account settings: should be switched off
- Port: 465 with SSL enabled, 587 with SSL disabled
- Authentication: set to Password
- Allow insecure authentication: should be switched on
- User Name: full email address
- Password: password for your email account
Click OK once done: 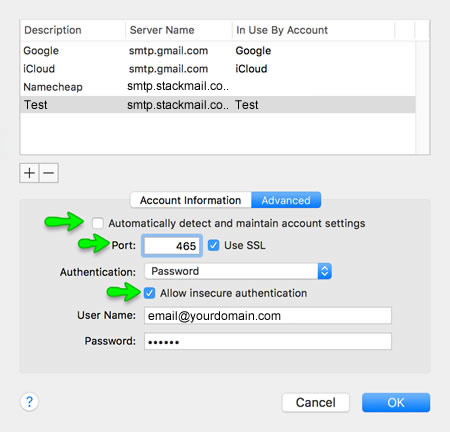
9. The next step is to verify Incoming mail server settings. In Accounts area of MacMail preferences, click on Advanced tab: 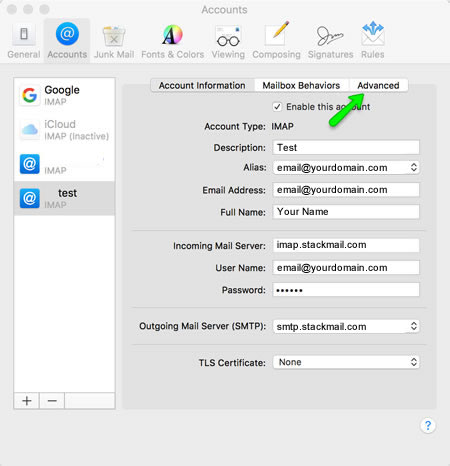
Verify that your Advanced settings are as follows:
- Automatically detect and maintain settings: should be disabled
- Port: 993 with SSL enabled or 143 with SSL disabled
- Authentication: Password
- Allow insecure authentication: should be enabled
- Use IDLE command if the server supports it: should be disabled

NOTE: once your settings are correct, click on red circle on the top left of preferences window: 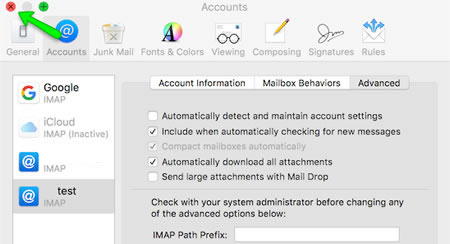
10. Click on Save in the pop-up window in order for your changes to get accepted: 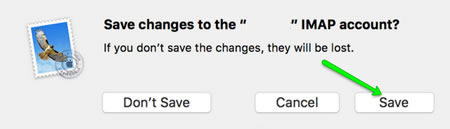
That's it!