This tutorial will show you how to set up a JetHost PRO email account on an Android 4x device.
We will be using a test email account email@yourdomain.com. Of course you will have your own email address so substitute that in the appropriate places.
NOTE: Before proceeding, make sure you have a mailbox created.
1. Locate your Email application: 
2. Fill in your email address and password: 
3. Click Next and select the type of protocol (POP3 or IMAP):
4a. IMAP ACCOUNT: The following steps will guide you through the process of IMAP account set-up.
- Your username and password should have been already filled in the corresponding fields.
- IMAP server: imap.stackmail.com
- Port: use port 993 for SSL connection (select in "Security Type' field) (or use 143 for non-SSL connection)
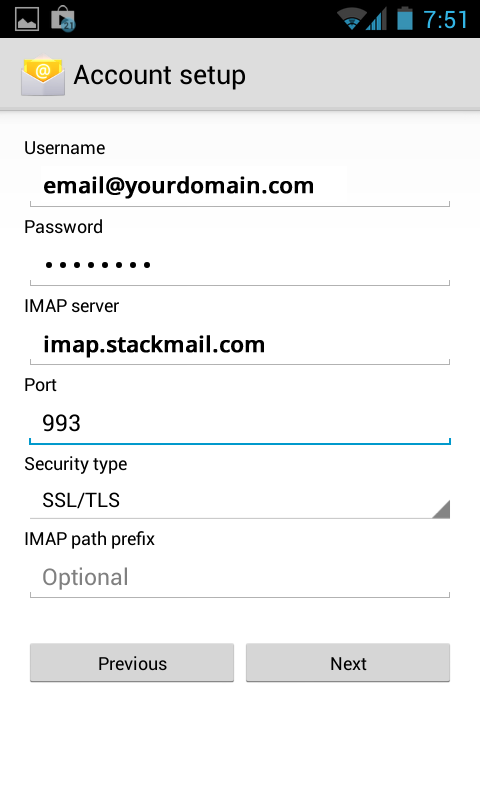
- Click on Next to proceed.
4b. POP3 ACCOUNT: Or, Indicate the following fields to set up POP3 account:
- Your username and password should have been already filled in the corresponding fields.
- POP3 server: pop3.stackmail.com
- Port: use port 995 for SSL connection (select in "Security Type' field)
- It is also possible to choose whether to delete e-mail from the server when it gets deleted from Inbox or not:

5. Click on Next to proceed
6. Indicate the Outgoing Server settings:
- Your username and password should have been already filled in the corresponding fields.
- SMTP server: smtp.stackmail.com
- Port: 465 for SSL connection (can be selected in secure type field) (or port 25 for non-SSL connection)
- Note, that Require sign-in option should be checked:
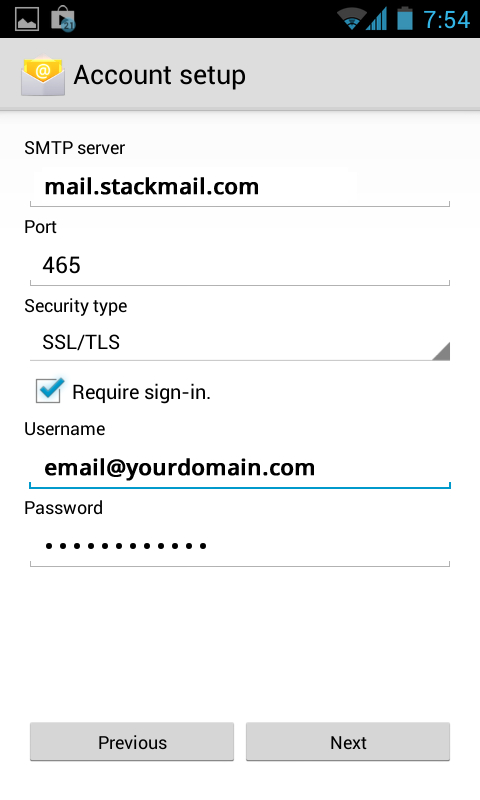
7. Click on Next to proceed
8. You will be able to indicate the following settings (check if apply)
- Inbox checking frequency
- Whether to set up this email account as default or not
- Notifications when email arrives
- Sync of emails for this account
- Whether to download attached files when connected to Wi-Fi or not
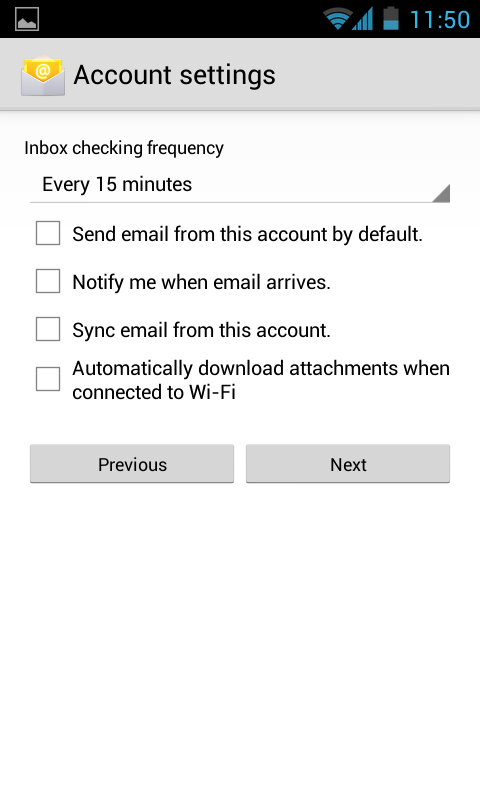
9. Click on Next to proceed.
10. You may assign a name to your email account in the following way:
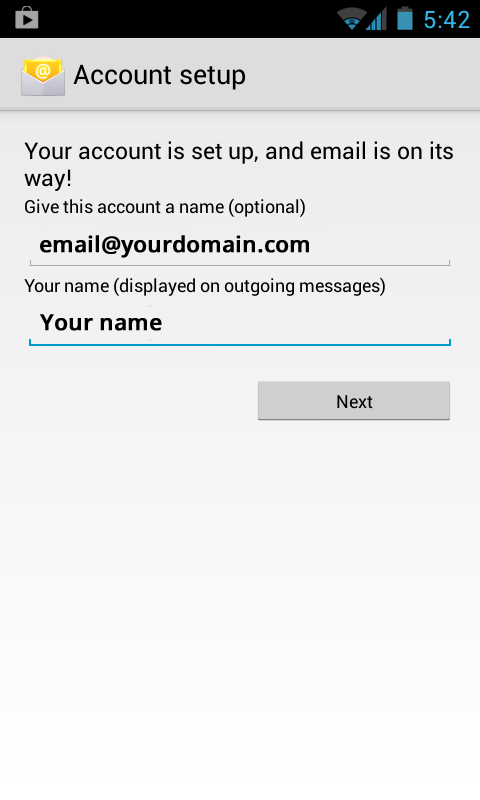
11. Click on Next to finish the set-up.