This tutorial will show you how to set up a JetHost PRO email account on an older iPhone device.
We will be using a test email account email@yourdomain.com. Of course you will have your own email address so substitute that in the appropriate places.
NOTE: Before proceeding, make sure you have a mailbox created.
Follow these step-by-step instructions to set up your email account on your older iPhone:
1. Select Settings from the home screen of your iPhone: 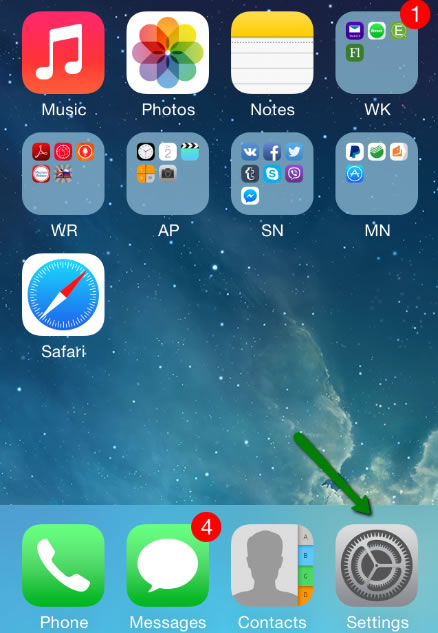
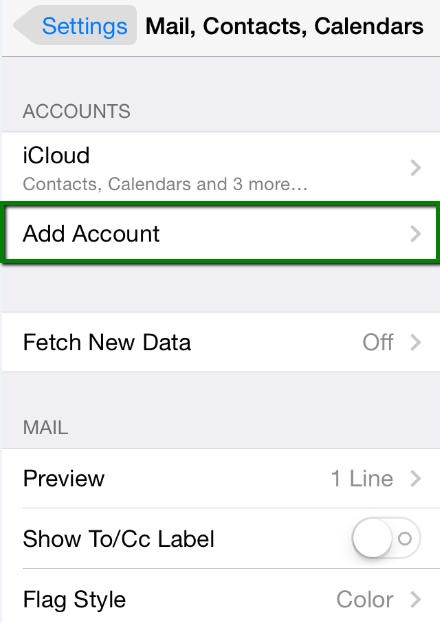
2. Choose Mail, Contacts, Calendars and click Add Account: 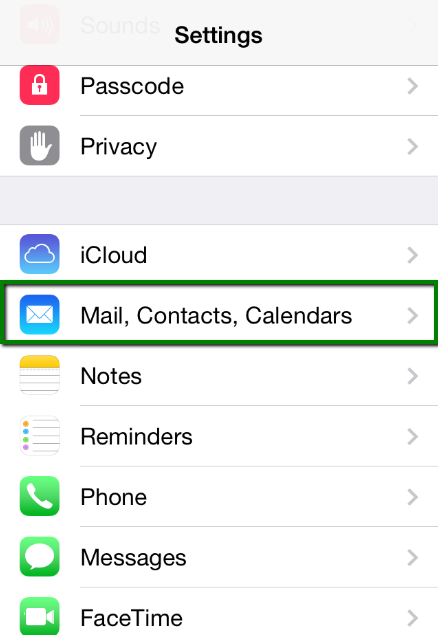
3. Choose Other from the list that appears: 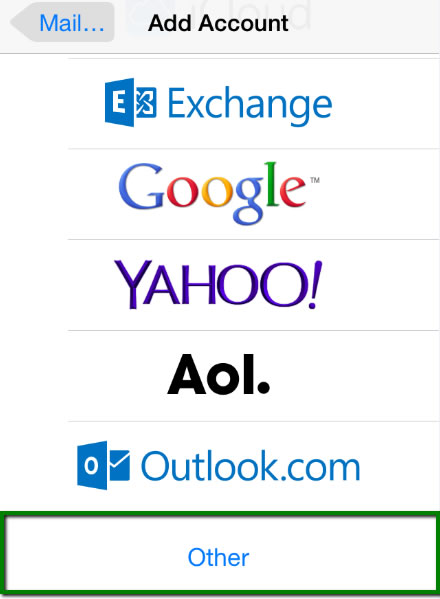
4. Select Add Mail Account. In the New Account menu, you will need to specify the following records:
- Name – your name (will appear as sender name)
- Address – your full email address, as created with JetHostPRO
- Password – the password for this email address
- Description – lets you specify any description (we suggest you use your name or email address)

Click Next.
5. Select protocol type: IMAP or POP3. We recommend you to use IMAP. Your selection will be highlighted blue.
6. Settings for IMAP and POP3:
- Name, Address and Description: should have been already filled in
- Host name: imap.stackmail.com or pop3.stackmail.com
- User Name: your email address
- Password: password for your email
In the fields for both Incoming Mail Server and Outgoing Mail Server, indicate the following settings: 
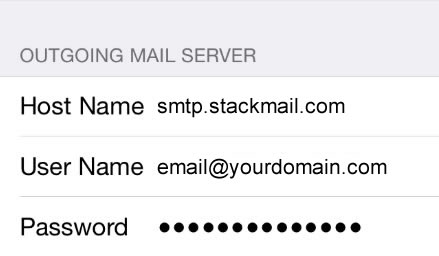
Click Next
7. If you use IMAP, you can enable the following services: 
Click Save and wait while the system completes necessary checks.
8. When the checks are finished, you'll be redirected to the Mail, Contacts, Calendars screen. Choose your newly created account there: 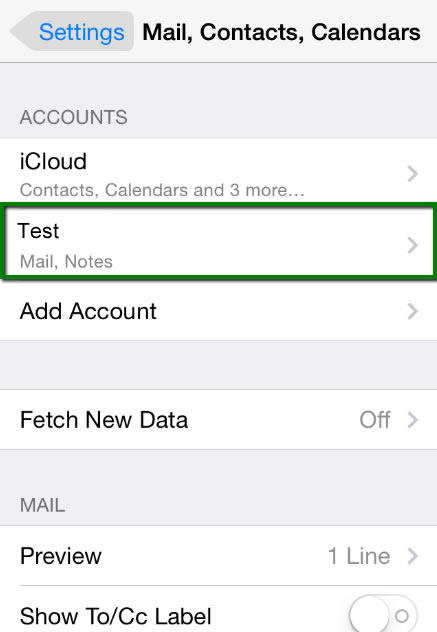

9. Scroll down and select Advanced: 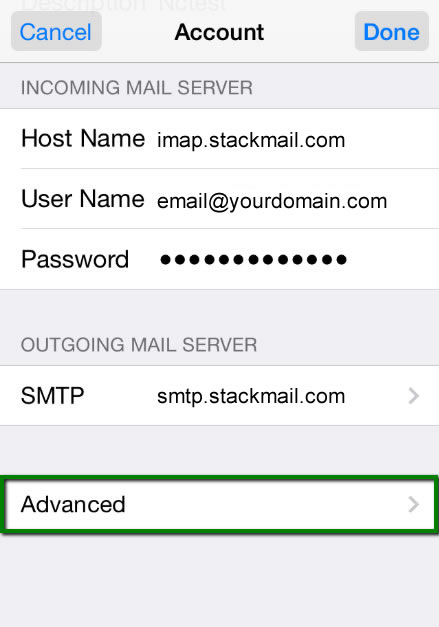
10. Here you can choose additional settings for IMAP or POP3.
If you set IMAP connection, you need to use port 993 (with SSL) or port 143 (without SSL)
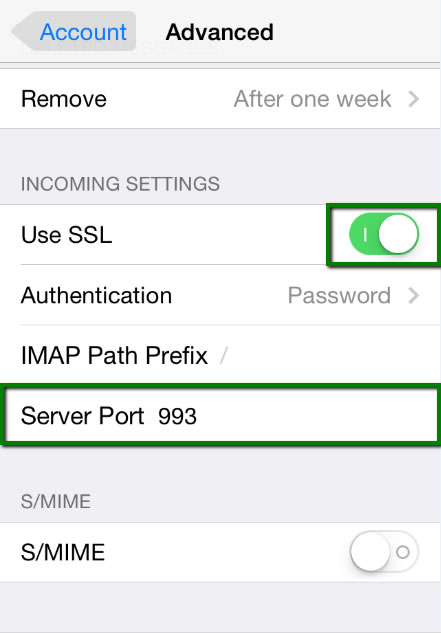
or 
If you chose POP3, you need to use port 995 (with SSL): 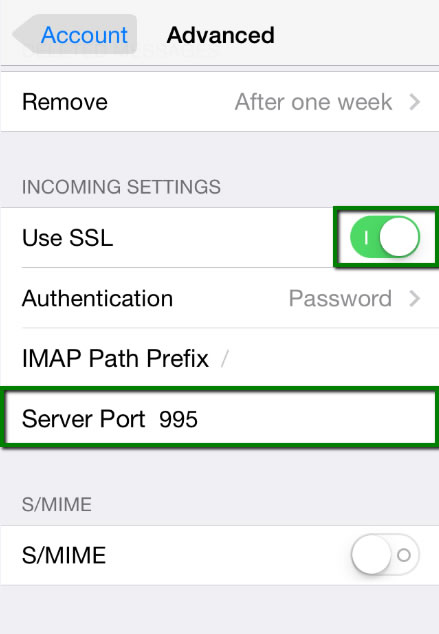
or 
11. In order to set up additional settings for outgoing server, you will need to return in the previous menu and then go to Outgoing Mail Server by clicking on the host name of the server: 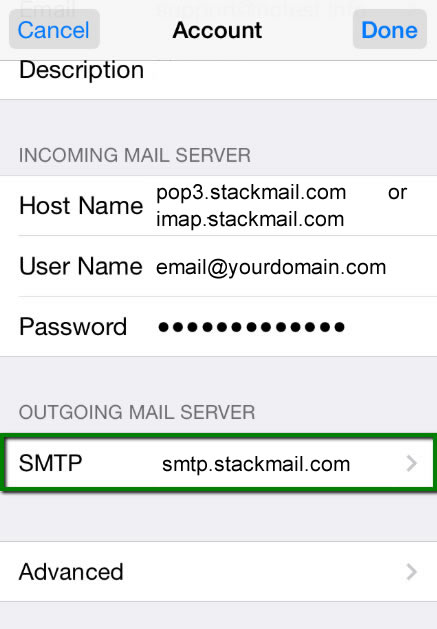
12. For Outgoing Server (SMTP), select port 465 (with SSL) or port 587 (without SSL): 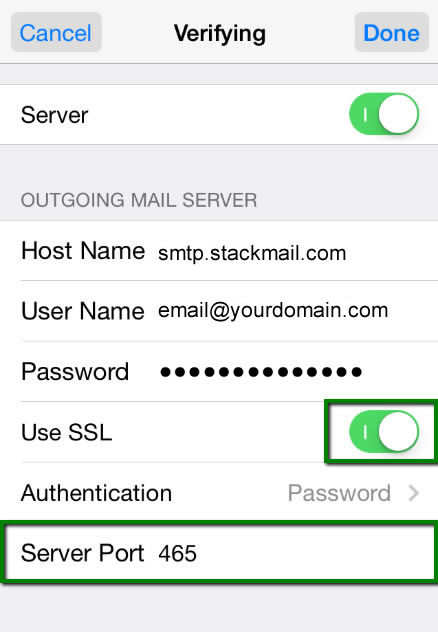
or 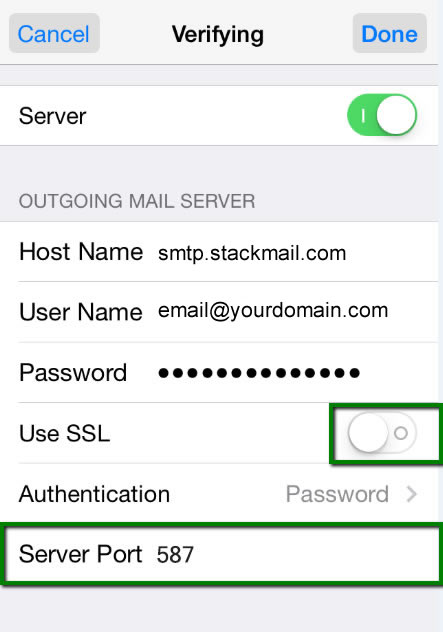
Once the settings are verified, your account is active and ready to use.
To test your new email account, go to Messages and try sending and receiving emails.
That's it!